T-shirt yarn or tarn as some call it, is created by cutting a t-shirt into narrow strands. The ideal method is to find a t-shirt without side seams and cut it into one continuous strand. Then you stretch it to make what I call curled t-shirt yarn. Here is a tutorial on how to make curled t-shirt yarn.
That is the process that I used to crochet this baby bib.
I used the bottom hem from the t-shirt for the ties on the bib. The free crochet pattern with all the details can be found here. I did do a few modifications to original pattern which are as follows:
After 5 years my old cast iron skillet’s handle cover was worn out. The top edge was scorched and the stitching was frayed. So it was time for a new handle cover. I got a ball of t-shirt yarn and crocheted this new handle cover.
I crochet my cast iron handle covers using this free crochet pattern and t-shirt yarn. I cut my t-shirts in thin long continuous strips and then pull on it to make what I call curled t-shirt yarn or tarn. Here is a picture tutorial showing how I make yarn from t-shirts.
I crocheted two dog bone toys using this free dog bone toy pattern. I tried out the crochet pattern in the multi-colored cotton first. After working the pattern, I thought it would be a great project to work in recycled t-shirt yarn.
I cut my t-shirt yarn using this tarn-making tutorial. My strips were cut thin as this helps make the material easier to crochet. Using t-shirt yarn about 3/8 inches wide and then stretched, it made a dog bone just a bit bigger than the cotton yarn one.
I used an old white sock cut into strips to stuff my dog bone toys. Using the recycled materials in these projects worked well. The dog bones are soft and should bring many hours of fun for my doggie to play with. Finished t-yarn toy size is
I have wanted to learn how to crochet using a Tunisian stitch and decided to try a small recycled material project to start out. I used a strip of t-shirt cut about 1/4 inch wide and then stretched it gently to curl it into what I like to call curled t-yarn.
Using the curled t-shirt yarn and a I sized Tunisian crochet hook, I set out to crochet myself a t-yarn coffee cup mat. I found this Tunisian stitch picture tutorial very helpful in learning the basic stitch.
To crochet my coffee coaster, I started with a chain on of 16 stitches with my t-shirt yarn and
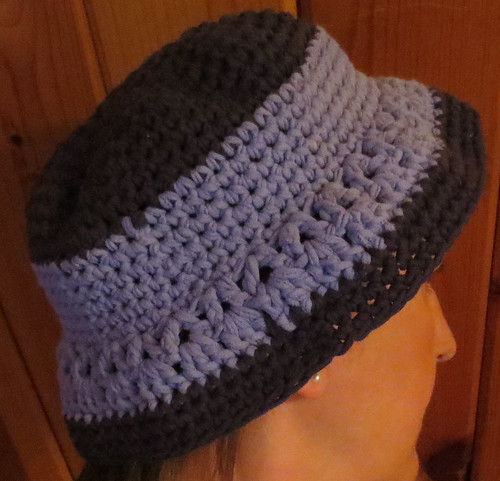
Here is my first attempt at a recycled t-shirt yarn hat. I did a little trial and error to get the hat so it fit comfortably on my head. Here is the finished hat that I crocheted from recycled t-shirt yarn.
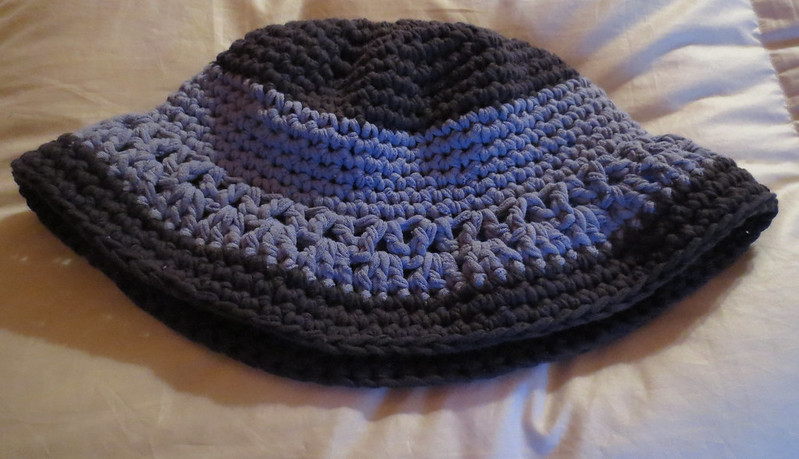
Here is a photo of the hat taken flat. It’s a comfortable bucket type hat that could be worn to keep the sun off your head and face while fishing, in the garden or at the beach.
Free T-Yarn Bucket Hat Crochet Pattern
Materials needed:
2) T-shirts cut into 3/8 inch wide strips and gently pulled to curl the t-yarn or tarn in two colors if doing the 2-color hat as shown. Click here for my T-Shirt Yarn making tutorial for recycling old shirts into T-yarn.
Hook: N – 9 mm U.S. size metal crochet hook
Finished measurements:
24 inches head circumference and 7 inches long
Rnd 1
With dark blue t-yarn, work 6 Sc in a magic circle. (6)
August 2, 2013 Comments Off on Crocheted T-Yarn Wash Mitt
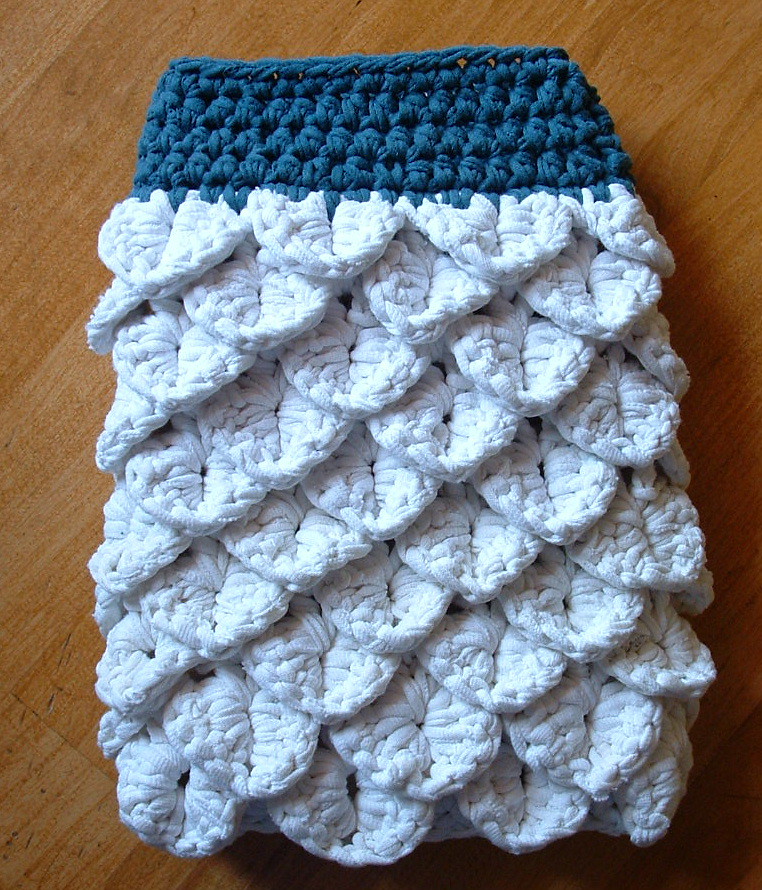
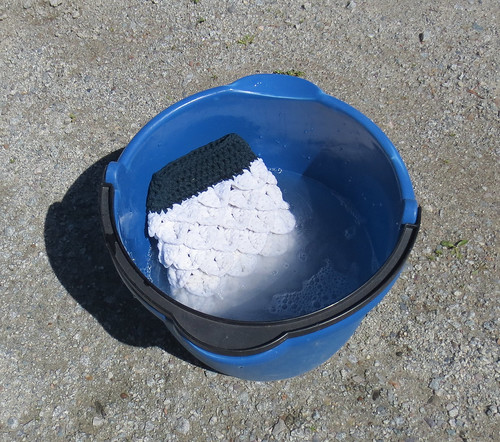
Here is a car wash mitt I crocheted using t-shirt yarn I recycled from several old white tee-shirts. I cut this t-yarn as narrow as I could to crochet this wash mitt. The result is a very thick wash mitt that you can use to scrub the car or other things you may need to clean.
I crocheted the wash mitt using the crocodile oven mitt pattern as the base of the mitt. I changed the cuff portion of the pattern to finish off the wash mitt using a colored t-shirt cut just as thin as possible. Make sure you stretch your t-shirt strips to create curled t-shirt yarn. Crochet the cuff using the colored t-yarn to complete the project.
I hope you enjoy this free crochet pattern and make yourself a cool recycled wash mitt from your old tee-shirts.
Crocodile Stitch Wash Mitt Pattern
J (6 mm) hook
Materials:
T-shirt yarn cut 1/4 inch wide (about 2 white tee-shirts)
Small amount of a contrasting color for the cuff (1/3 of a colored tee-shirt)
Finished crocheted wash mitt measures 7 inches wide by 9 inches long. The cuff portion is 1-3/4 inches long with a 4-1/4 inch wide opening.
Special Stitch:
Crocodile Scale Stitch: Dc 5 stitches down first post of the 2-Dc base set, Ch 1, and then work 5 Dc up the 2nd Dc of the 2-Dc set.
Directions:
With J hook and t-yarn, Ch 42.
I bought myself a new cast iron skillet today. I love cooking with cast iron. No worry about non-stick coatings coming off the skillet and eating the coating material. Cast iron cooking pots and skillets literally can last a lifetime if cared for properly.
So I needed a medium-sized skillet for cooking and bought myself a new Lodge cast iron #10SK 12 inch skillet. Of course I needed a new handle cover for the new pan. I have crocheted pot covers for my other cast iron pans and they are so handy. You don’t need a potholder to move it and the handle cover is always on the pan. I just leave the cover on the pan as generally the handle doesn’t need cleaning or seasoning.
Here is the free crochet pattern for the t-shirt yarn handle cover. I cut my t-shirt strip in one continuous strand about 1/4 inch wide. Then I gently stretch the narrow strand which causes it to curl in on itself. I call this material curled t-yarn.
This skillet handle is a bit narrower than my big cast iron 14 inch pan so I had to work a decrease on each side of the cover
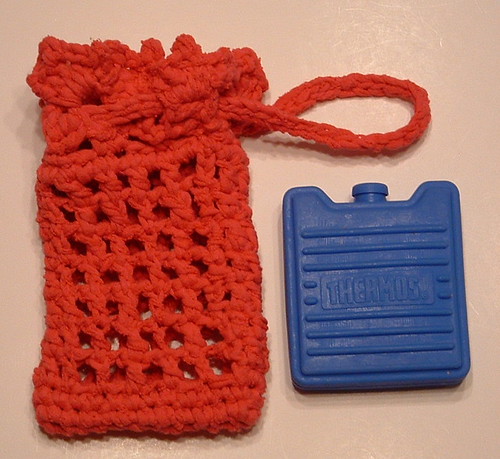
This ice cozy was crocheted from a T-shirt cut into strips to create T-yarn or tarn. I often use an icy brick in my lunch bag and wanted a little cozy for it. The ice block gets wet and has condensation after a while in my lunch bag. Now with the tarn ice cozy, it works wonderfully to keep my lunch bag dry and to capture the condensation from the ice brick.
I cut my T-shirt strips very narrow to make this cozy. Here is my T-yarn tutorial showing how I cut and stretch my strips to create what I like to call curled T-yarn. The only change you want to make for this project is to cut your strips only about 1/4 inch wide. I know this is narrow but if you cut slowing and carefully it works out so you have a nice thin strand to crochet with.
I used the following soap saver pattern to crochet my ice brick cozy. This tarn project and free crochet pattern was a Tarn Along over Recycled into Yarn site. The final measurements are 6 inches long by 3-1/2 inches wide. I did make mine a bit bigger at the beginning and crocheted 3 DC’s in the corners so the icy block would fit and its plenty big. I have 28 stitches in the bag around with 8 crowns at the top.
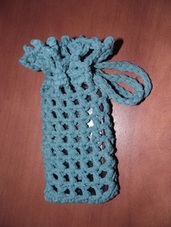
The tarn cozy was made with less than one T-shirt and could be used for an ice cozy as I have done, a soap saver, or even an i-Phone holder as shown here that Teresa did in the original Tarn Along.
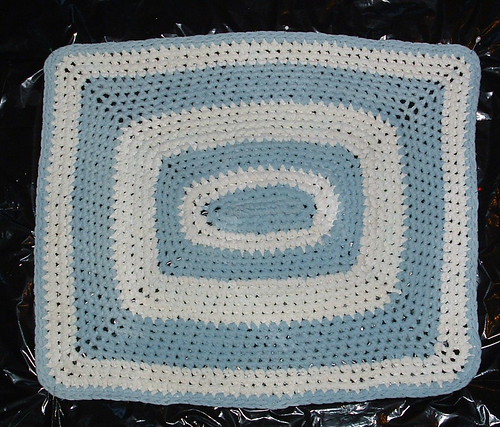
This week’s project is a rug I crocheted from a couple of old white t-shirts and the remaining pieces of a blue jersey sheet. I cut my cotton into 3/4 inch wide strips using my t-yarn making tutorial. Recycling t-shirts and old cotton sheets is a great way to repurpose those old items into new usable rugs, oven mitts, trivets, baby bibs, and more.
Once completed, this t-yarn rug had a problem. The center was not flat and the rug needed blocking badly so this week’s project turned into a two-fold post. A blocking tutorial for t-shirt yarn rugs and the free crochet pattern for the rug.
I didn’t take a photo of the rug before blocking but trust me, the center was all rumpled up and the rug wasn’t laying down flat. I used the same process I did when I blocked a round ripple afghan that was bowl-shaped in the center. My blocking method helped flatten both projects and really saved me a lot of frustration so I wanted to share how I did it. So first I will show how to block a t-shirt yarn rug.
Lay the rug down and stretch it out on a large piece of plastic on the carpet. I used a large trash bag and then just reuse it for the next blocking project. I pin it all around as I stretch the rug and shape it. Use lots of pins and push them down into the carpet to hold the rug in place. Then using a wet rag or wash cloth, press down and wet the rug. Move your cloth around and continue to wet it and as you do, shape and stretch your rug. I laid a wash cloth down as shown and with my hands flat, I move my hands around on top of the cloth. My center was the real problem area so I pressed down and wet this area more as I worked out the rumpled center.
Click on any photo to supersize
Next photo shows after I have been shaping and flattening out the center. Move your pins as needed to get the rug flat and a nice shape. Gently pull on the corners and edges to get it as straight and square as possible. Apply more water on a rag as needed.
Once you have the center flat and the rug shaped, its time to let it dry. I let my rug dry overnight with the pins in place. The next day, I removed the pins and flipped it over gently and let the back dry. The next morning the rug was completely dry and the rug held its shape rather nicely.
Closeup of the t-yarn rug once it was blocked and flatten. As you can see its pretty flat and I can live with how it looks now. I hope you find this t-yarn blocking tutorial useful should you find your rug or other projects need a little flattening.
Below […]


Recent Comments