
This week I am sharing my diagonal potholder and dishcloth set. I previously have attempted to crochet a diagonal potholder without much success. You probably have seen several different versions of this potholder pattern that you crochet on the diagonal. I have tried before to crochet one of these but it just didn’t turn out right. Well I decided after reading another crocheter’s blog about using the double thick potholder pattern with success that I would give the pattern a try.
My first attempt turned out okay but the potholder was way too small for my liking. So then using a H crochet hook, I chained 32 stitches to begin the pattern. The result is the potholder shown which is about 5-3/4″ square. I like this size much better and the corners are pretty straight. If your diagonal potholder isn’t real square, just try pulling on the corners as this helps straighten out the corners. I added a dishcloth using my open mesh magic dishcloth pattern to complete the matching set.
It’s been a busy week and I wanted to share some crocheting with you all. I will be back next week with a new pattern as I have been working on several new projects but just didn’t get any new patterns written and pictures taken yet. So until next time, happy crafting to all!

For all those log cabin pattern lovers out there, here is my version of a log cabin potholder. This potholder or hotpad was crocheted using scraps of cotton yarn I had on hand. I have also been saving all my juice and milk jug rings for crafting projects. This plastic ring is a larger one that I recycled from an apple jug. Using these recycled rings saves you from having to purchase store bought rings for your potholder projects.
The potholder or hotpad completes my set that includes the log cabin scrap dishcloth pattern I posted last month. These items are an excellent way to use scraps of cotton that you may have been saving and not sure what could be done with the small bits. My pattern is written with specific colors listed but you can mix and match the colors depending on what you may have on hand.
As always, please enjoy the free crochet pattern below.
Log Cabin Potholder Pattern
Hook:
H (5 mm) USA crochet hook
Materials:
Cotton yarn scraps in 6 colors
2 ozs contrasting Cotton yarn for trim and back of potholder
1 plastic ring
Description:
8 inches x 8-1/2 inches Cotton Potholder/Hotpad
Directions:
Row 1
With light blue yarn, Ch 12, Hdc in 2nd ch from hook and in ea st. (11)

I have wanted to make a log cabin design dishcloth for some time now. I thought it would be a wonderful opportunity to use up some scrap cotton yarn that I have. I have looked at several different log cabin designs and just decided that I would grab a crochet hook and see what I could come up with.
Here is my first completed log cabin dishcloth. It’s not square but who says a dishcloth really needs to be. Well I used 6 different colors of cotton yarn to complete my dishcloth. I’m thinking it would be a great hotpad too and am starting another one right now which I’ll add a solid color for a back which will give it a double layer.
I wrote up the crochet pattern for this and hope it makes sense about where to attach your yarn as you change colors. I always started the new color on the right side (RS) of the dishcloth and you can use the photo to help you with your starting points. Remember you can always deviate and do your own thing with the colors and the number of rows. It’s kinda like doing a freeform but still keeping the log cabin design as your goal.
Well, I hope you enjoy the free crochet pattern below. If you use my pattern, please let me know how your dishcloth came out and I love to see photos of my reader’s creations.
Log Cabin Scrap Dishcloth Pattern
Hook:
H (5 mm) USA crochet hook
Materials:
Cotton yarn scraps in 6 colors
1/4 oz contrasting Cotton yarn for trim
Description:
8-1/4 inchesx 10-1/4 inches Cotton Dishcloth
Directions:
Row 1
With Cream color, Ch 12, Hdc in 2nd ch from hook and in ea st. (11)

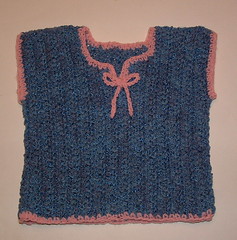
This crocheted newborn baby sweater vest is a variation of my Ana sweater that I created. The Ana sweater vest pattern is for a toddler’s size 2-3 but several people have asked for a smaller size which I am happy to share in this post today.
I crocheted a matching hat using Barb’s seamless baby hat pattern. I just added a few rows of single crochet stitches around the edge to match my trim on the baby sweater vest to complete the set.
This baby vest was crocheted using a sport weight yarn that I obtained from a free yarn swap so I’m not exactly sure what it is. It’s a soft yarn with a darker blue ribbon thread that runs through it. I used a pink contrasting yarn to finish off the project. For the newborn sweater, I used a bow tie at the front rather than a button closure but you can switch up the patterns and use either style for your sweater.
I hope you enjoy the free crochet pattern below — Enjoy!
Newborn Sweater Vest Pattern
Finished Newborn baby vest measures: 8-1/2 inches wide by 8-1/2 inches long
Hook: Metal G (4 mm) US sized crochet hook
Materials:
4 ozs – Sport or Aran weight yarn and a small amount for contrasting yarn for trim
Row 1 (Back piece)
Ch 36

Happy New Year! Wishing everyone a wonderful 2011 and I hope you all are planning all kinds of fun and frugal craft projects for the new year. Me, I’m working on a newborn sized Ana sweater shell. I have had several people ask for a smaller version of my Ana sweater pattern as the original pattern is about a size 2. So you know me, ask and you will receive. Anyway I should have the newborn sweater pattern posted in a few weeks as I’m just finishing it up now.
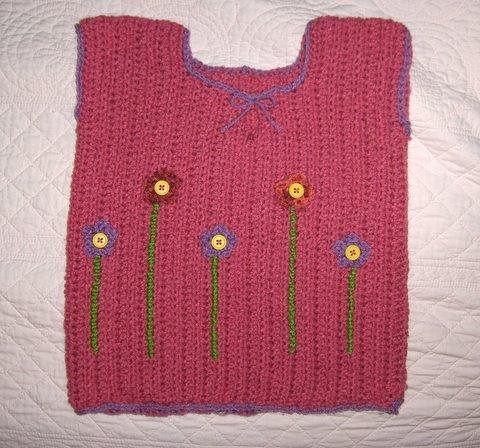
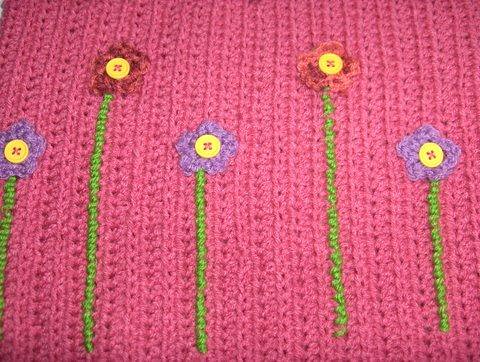
A reader just shared her finished Ana sweater vest with me. Sara, who I might add is just 13 years old, sent me these photos of her vest that she crocheted using my pattern. She added these adorable flowers and used contrasting yarn to trim her Ana sweater vest. I just love Sara’s embellishments and admire her crocheting talent at just 13 years old. It has been my pleasure to share Sara’s beautiful vest with all my readers. Enjoy and make it a great new year!
*********************************************************************************************************************

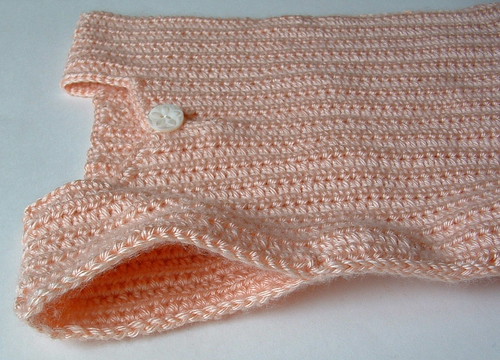
I present my crocheted toddler sweater vest shell. I have named this project the Ana Sweater Shell in honor of my sweet Granddaughter who this sweater was created for. The sweater is worked from the sides rather than from top to bottom as is with most crochet patterns. Because it worked with the stitching running up and down, it provides a unique and easy to finish crochet project.
I first saw this idea from a sweater shell that Guro crocheted over at her blog but she did not have a pattern written up. Well after checking with Guro, she said to just go ahead and feel free to be inspired by her project so this is my results. I worked my vest shell in half-double crochet stitching while hers was done in single crochet.
I really love this sweater as it is so versatile. It can be worn as a vest over a t-shirt or blouse and it can also be worn as a shell alone in warmer temperatures.
Click to Super-Size
My vest shell is about a children’s size 3 and should fit a toddler who is around 2 years old. It has a longer body so it’s a nice length for a toddler. The vest fits my Granddaughter who is 15 months old. The pattern has been written up and while I have not tested it, I believe it’s pretty solid but please email me if you have any questions or find any errors in my free crochet pattern below.
___________________________________________________________________________________________
Crocheted Toddler Vest or Shell Sweater Pattern
Finished toddler vest measures: 12 inches wide by 14 inches long
Size: Children size 2-3
Hook: Metal G (4-4.25 mm) US sized crochet hook
Materials:
6 ozs Caron Simply Soft Yarn in Lt. Country Peach
(315 yards/288 meters of 4-ply worst weight yarn)
1 inch Button for front closure
Row 1 (Back piece)
Ch 57

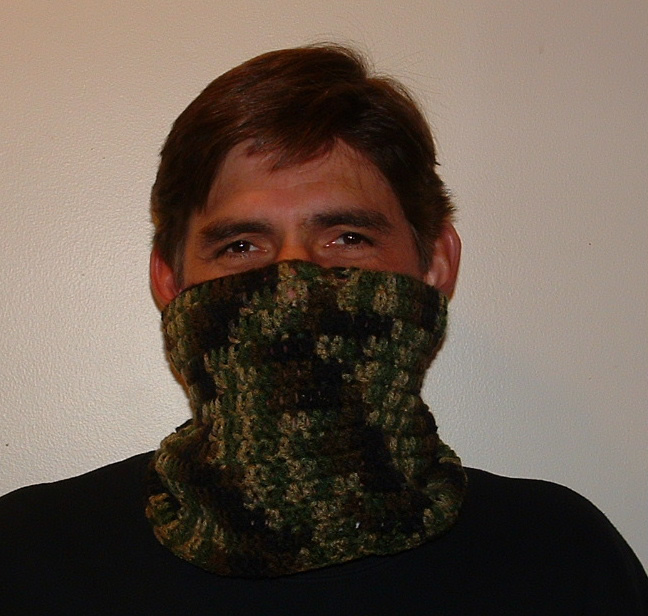
I present my crocheted neck wrap scarf. It is crocheted in the round and just slips over your head. As shown, it can be worn up over the chin and nose. It would make an excellent neck warmer and face warmer for winter and for snowmobiling.
You can make it smaller and larger as desired by just adjusting your beginning chain. I have made several of these and found the snugger fitting ones work better for staying up on the nose. You can wear it just around the neck but this scarf gives you the option of pulling it up around the chin and nose to keep you extra warm.
This is a very quick and easy project that uses less than 3 ounces of worst weight yarn. These neck wrap scarves make excellent gifts and would be a great Christmas gift too. Enjoy the free crochet pattern below.
Crocheted Neck Wrap Scarf
Finished adult scarf measures: 11 inches wide by 7-1/2 inches long
Hook: Metal G (4-4.25 mm) sized crochet hook
Materials: 3 oz Camo Super Saver Worsted Yarn
Rnd 1
Ch 65 loosely and then join to the beginning to create a circle. Be carefully that your chain is not twisted when you join the first round. […]

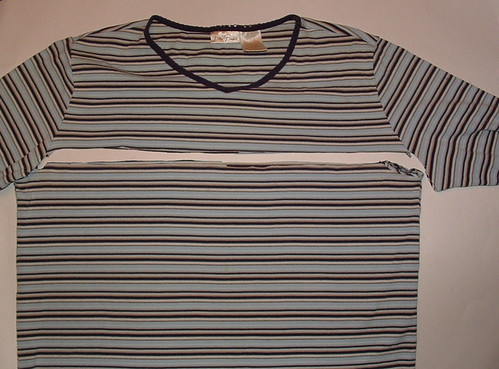
This month’s challenge over at Trash to Treasures on Ravelry has been to do a wardrobe re-do. This means to take some old clothing item and transform it into a new and useful item. I have had this striped t-shirt that I have been saving just for such a project. The neckline was frayed and this old tee needed to be upcycled into a new shirt.
Here is the before photo of my t-shirt.
Next I cut off the top of the shirt as shown.
I loosely followed the Drop’s crocheted yoke pattern that was added to the top of a knitted sweater for my project. I first zig-zagged around the top cut edge of my shirt to prevent it from unraveling. I ended up running around the top edge twice just to make sure the seams wouldn’t fray. I chose Lion Wool yarn in midnight blue and it took just one skein (3 ozs) to completed my yoke. Using a #7 steel crochet hook, I worked around the top edge by poking a hole and pulling my blue yarn through the hole. I did a single crochet stitch evenly all long the front, underarms, and the back of the shirt. I used a G hook from this point on.
Once my base row was completed, I needed to reduce the number of stitches around, so I work 2 single crochet stitches together around the entire next round. I then worked round 3 with a double crochet in each stitch and chain 30 (8-1/2″ long) for the sleeve opening on each side of my shirt. From here I worked more decreased evenly over the next rounds while somewhat following the chart in the Drops Design pattern. I did find I had to make more decreases to get the yoke narrowed down but in the end it turned out nicely.
Here is my final crocheted yoke photo. The dark wool just doesn’t want to photograph very clearing but you can click on the photos to supersize them. So if you have an old t-shirt, consider adding a crocheted yoke to give it a new look like I did in this wardrobe re-do project.

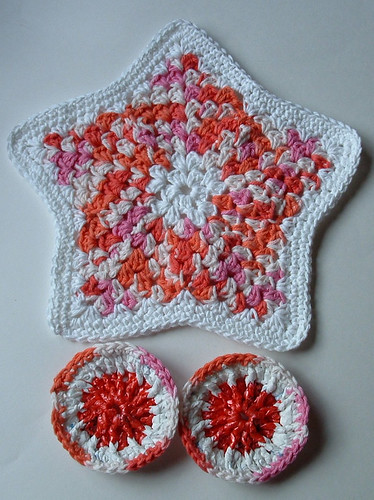
Here are a few dishcloths I crocheted along with some recycled plastic bag scrubbies. I purchased this large clearance skein of Bernat cotton yarn and have been making kitchen sets with the cotton. I crocheted the plastic scrubbies and then added a final round on the scrubbies using the cotton so it matched the dishcloth.
To the right is my star dishcloth pattern but I did the two final rounds by working Sc’s in each stitch and 3 Sc’s in each point of the star. I thought by working the last few rounds in single crochet with white cotton yarn that it added a nice finish to the dishcloth.
The scrubbie dot pattern was adapted by using plastic bags cut into 3/4″ wide strips to create plarn and then using a “J” hook, I crocheted the pattern as written except for the final round which I used the cotton yarn to match my dishcloth.
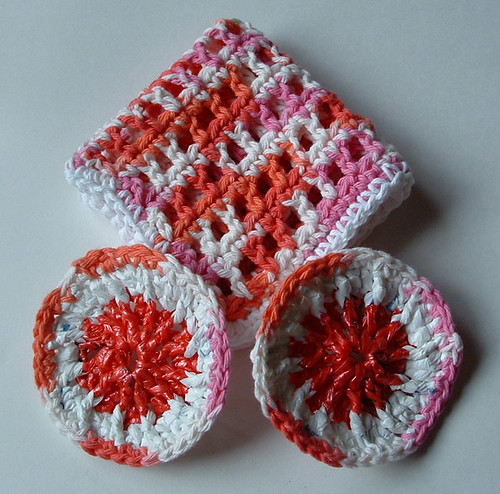
Here is my open mesh magic dishcloth pattern using the same cotton yarn. The scrubbers were again plastic bags with the final round done in the cotton yarn to match.
So if you want to crochet some recycled plastic bag scrubbies, consider adding a final round of cotton yarn to them so they can match the dishcloth to create a unique kitchen set. These make excellent eco gifts and people really find the scrubbies handy.


Recent Comments