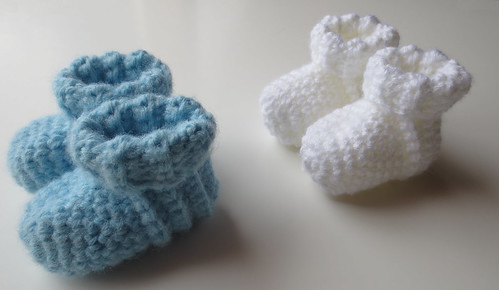
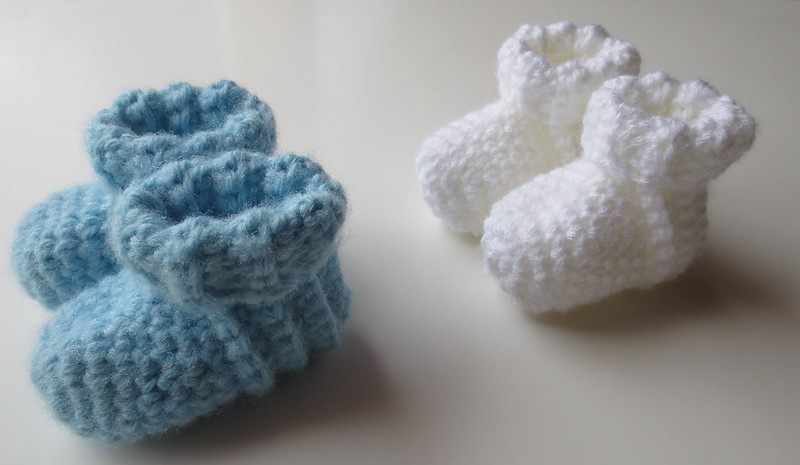
Here are my crocheted baby booties that feature a cuffed top. I did a variation of the original slipper sock pattern by Sharon Klinsky that can be found on several different crochet sites.
There is a wonderful picture tutorial of the original pattern over at Coffee n’Crafts blog site that I found very useful to understand the pattern. Just use a single strand of worst weight yarn for baby booties that will fit a baby up to 6 months old. For a preemie sized newborn, I used a smaller crochet hook and some sport-fingering yarn. If you are wondering, the creme-colored preemie socks shown below have a different stitch look because I turned the toe portion inside out before adding the ribbed heel. By reversing the toe portion, it results in a horizontal stitch look rather than a circular pattern.
Cuffed Baby Sock Booties
Crocheted Baby Cuffed Sock Booties
Crochet hook: H (5 mm) hook
Yarn: 1 oz Worst Weight Yarn
Newborn to 6 months old 3-1/2″ long by 2″ wide (standing)
Preemie – Newborn size using sport yarn and a G hook is 2-1/2″ long by 1-1/2″ wide
Preemie Size Cuffed Baby Booties
Rnd 1
Ch 2, work 5 Sc in 2nd ch from hook. Don’t join as the toe section is worked in rounds without joining. Place a stitch marker at the beginning of each round.
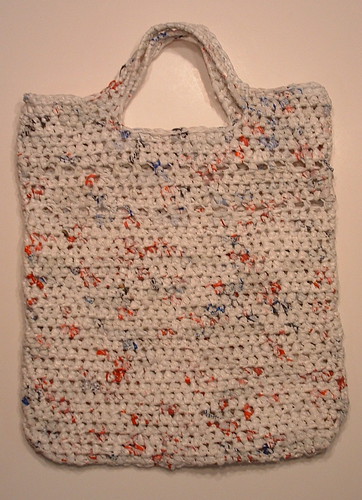
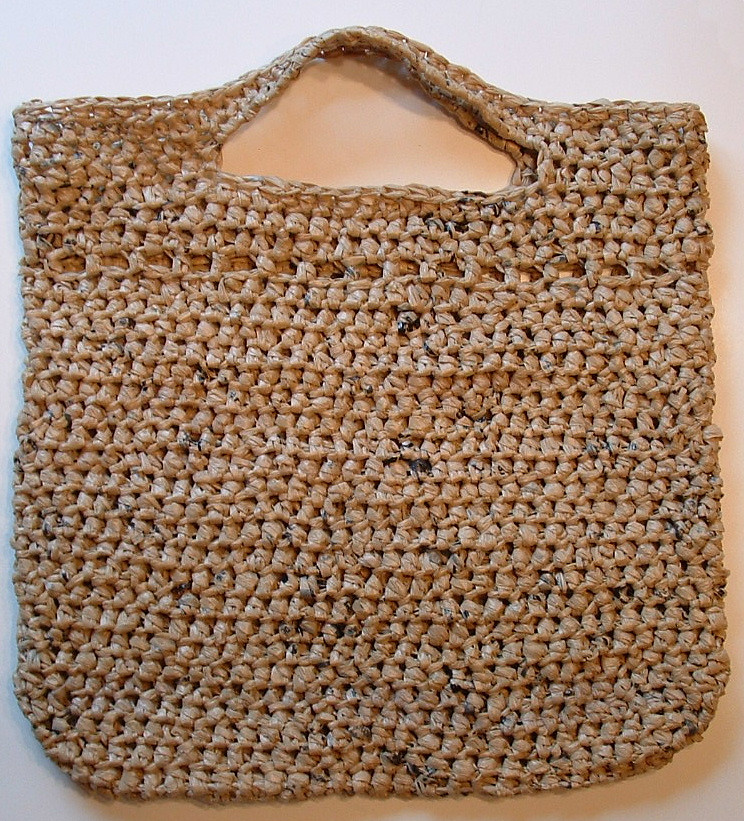
Time to share a new recycled bag project. I’ve been busy with charity crocheting but rest assured, I’m always working on recycled craft projects too. Here is a recycled bag that features a double picket stitch design. In the original Plarn Picket Stitch tote pattern, I crocheted just a single picket stitch on the plastic bag tote. In this tote bag, I repeated the special stitch pattern to add a different look to the project.
Follow the original crochet pattern instructions through round 28. Then repeat rounds 24 and 25 to make another round of pickets on the tote bag. Once you have the 2nd round of pickets done, simply finish the reusable tote by working rounds 26-32 from the original pattern. Basically by adding the double picket stitch design, you increase the length of the tote bag by about 2 inches.
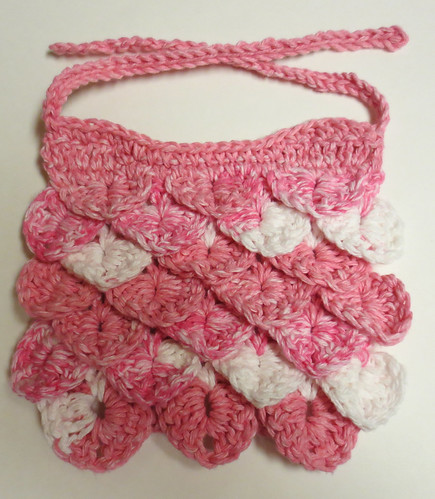
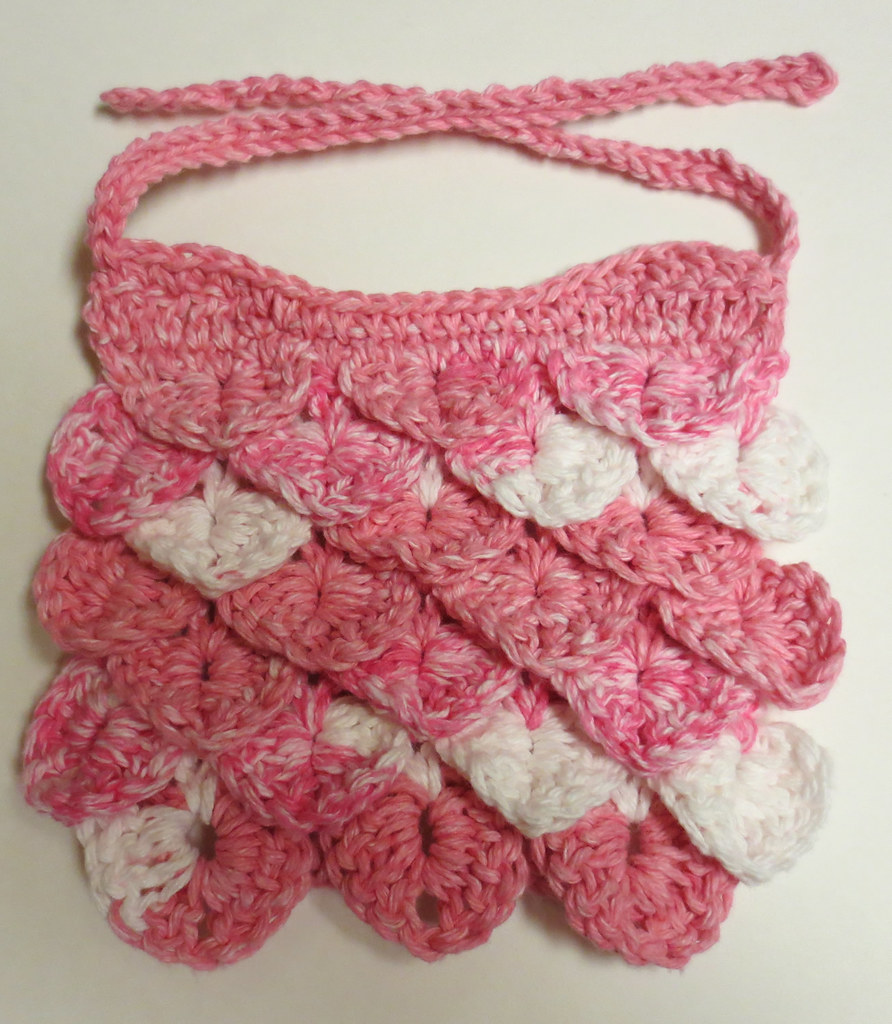
One of my goals this year was to learn the crocodile stitch. I watched several you-tube videos on the stitch and while there are a few different variations, the stitch is generally crocheted the same. Some people work a chain stitch between scales and others end the rows a little differently.
Here is a quick and simple little crocheted baby bib pattern I came up with using the crocodile stitch. If you are learning this stitch for the first time, you may find this instructional post and video helpful as you learn the stitch. The crocodile stitch is easy once you get the hang of working the base rows and scale rows. I hope you enjoy crocheting the baby bib pattern and working the crocodile stitch.
Crocodile Baby Bib Pattern
I (5.5 mm) hook and H (5 mm) hook for edging
1-3/4 oz / 80 yards of Cotton Yarn (Sugar’n Cream Pinky Stripes used)
Baby bib measures 7 inches wide x 7 inches long with 9 inch ties.
Directions:
Row 1
With I hook, Ch 18 loosely. Dc in 3rd chain from hook.
*Ch 2, Skip 2 Ch, 2 Dc* repeat until the end of the chain. (6 2-Dc sets)
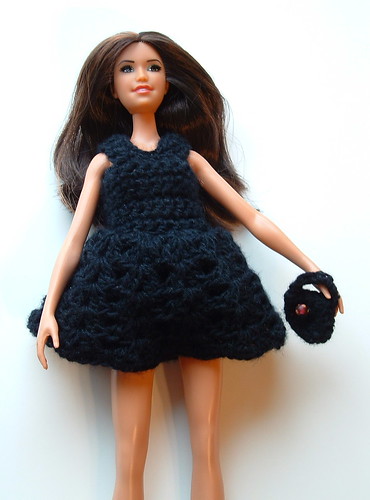
Here is Barbie’s little black dress that I crocheted with some fingering yarn. This is a variation of my Barbie baby doll top pattern. I took the original pattern and made a few modifications to create this dress pattern for a small Barbie doll.
I worked even on 20 sts from row 2 with a G (4 mm) crochet hook. Repeated row 11 for 5 rounds to round 15.
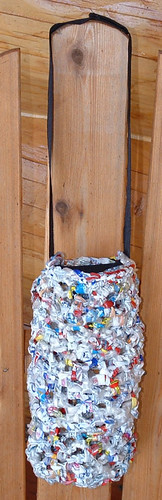
This week’s project is a bit different. It involves recycling plastic balloon bags and creating a pump holder. Let me explain the story behind this project. I was contacted by TristnShout Balloons to see if I was interested in recycling their empty balloon bags. Apparently they have an abundance of empty balloon bags and wondered if I’d be interested in crafting with them. They also expressed the need for a holder to hold their portable air pumps that they use to fill balloons.
After a discussion with them, it was agreed that I would design and craft a holder for their balloon air pump using the recycled plastic balloon bags. I made four of these balloon holders from the bags they sent to me.
I have shared the free crochet pattern below should anyone want to make this bag holder. The pattern would work for a water bottle holder as well as other uses. The holder was designed to have a strap added for carrying as shown. With the large eyelets on each side, it could also be used on a person’s belt by threading through one of the eyelets.
^^^^^^^^^^^^^^^^^^^^^^^^^^^^^^^^^^^^^^^^^^^^^^^^^^^^^^^^^^^^^^^^^^^^^^^^^^^^^^^^^^^^^^^^^^^^^^^^^^^^^^^^^^^^
Recycled Plastic Balloon Bag Holder Crochet Pattern
Bag measures 4 inches wide and 9-1/2″ long with 1-1/2 inch hole in bottom
Materials: One ball of plastic yarn made from balloon bags- Approx. 30 bags
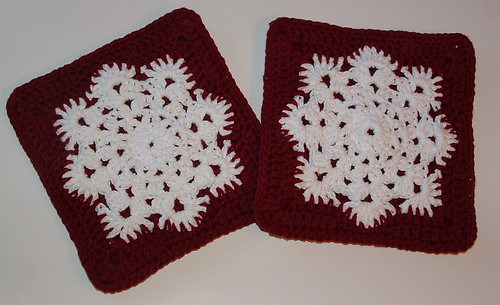
It’s Christmas Eve 2012 and so it seems appropriate to share some Christmas snowflakes. I crocheted these Christmas snowflakes for gifts this year. I made two potholders using this crocheted snowflake pattern. I worked the snowflake on the front panel only and then a solid single crochet piece for the back of the potholders. The back panel is 27 stitches wide for 30 rows using a G hook.
Then I crocheted just the snowflake using an H (5 mm) crochet hook to create a dishcloth. The result is a 8-1/2 inch square cloth. I added the dishcloth along with
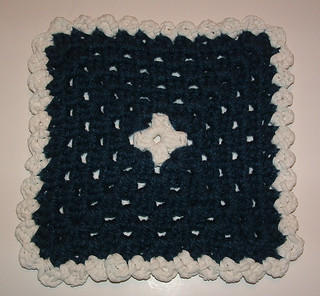
Here is a hotpad I crocheted using my T-yarn trivet pattern. This hotpad’s yarn is a combination of a white t-shirt cut into a very narrow strip to create what I call t-yarn and some leftover Red Heart chunky blue yarn.
I crocheted with the white t-yarn for the center and scalloped edging. I did one extra round with the blue chunky yarn to make the hotpad just a bit bigger and to use up the small amount remaining. The result is a hotpad trivet that is 8-1/2 inches square.
I wanted to use the chunky acrylic yarn to show how a t-shirt yarn pattern can be used with regular yarn too. You could also make this hotpad by holding two strands of worst weight yarn together to crochet the pattern. Either way, you end up with a great looking motif hotpad trivet.

I recycled a few more old Christmas cards into Christmas ornaments. This time I made 4 inch round ornaments from some old cards I have been saving. I used a small bowl from the kitchen to make the round circle. I just placed the bowl over the part of the card that I wanted to cut out. It worked well to place it so I could see if I was capturing all the area I wanted for the ornament. Then I just traced around the edge of the bowl with a pencil and cut out the circles.
You can read all the details on how to recycle Christmas cards into ornaments in a previous craft blog I did last month. These are really quick and easy projects and a wonderful way to recycle old Christmas cards.
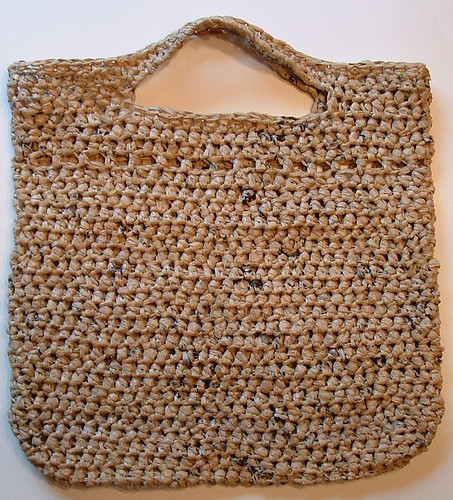
This recycled bag features a new stitch design that I added for a new look to my latest reusable bag. I call this stitch the Picket Stitch. I have used a similar stitch idea in my picket fence dishcloth pattern and thought it would be interesting to use on a tote bag pattern. It adds a different look and I’m always trying to come up with new ideas for dressing up my recycled bags.






Recent Comments