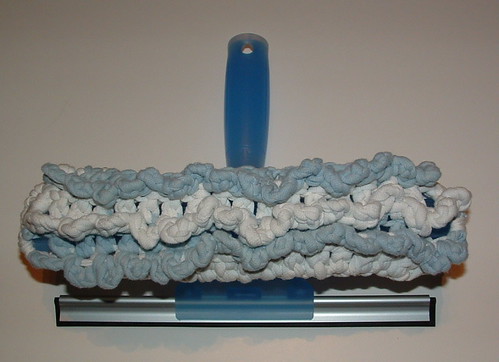
Need a swiffer duster sock? Well I did for my Unger so I cut up one white t-shirt and a small amount of a blue jersey sheet to crochet my duster cover. I cut my t-yarn 1 inch wide and stretched it gently as shown in my t-yarn making tutorial.
My Unger is a squeegee with a swiffer-like head on the other side. I want to be able to use the other side to dust and clean high areas in my house with the extended handle on the Unger.
I used the Craftstylish crochet reversible swiffer pattern as a basis for my duster cover. Because my tool is narrower than a Swiffer, I had to modify the original pattern. The beauty of the pattern is that it is easily adjustable to fit different sized cleaning tools. The pattern has great pictures and works up really quickly.
Okay now for my modifications:
I used N (9 mm) crochet hook. I chained 19 to begin my cover. I only crocheted 3 rows of ruffles in the middle. Then one round of SC in each stitch and then several decreases of Sc on last round to fit my Unger.
Finished size: Fits a tool head 10 inches long and 1-1/2 inches wide when stretched.
My finished t-yarn cover turned out perfect and I love the ruffles on the duster. It works great and I plan to use the same ruffle design to make a mop cover. Using recycled t-shirts for this project worked wonderfully as the cotton is soft and absorbent. Now I just need to get busy and do some cleaning with my new tool.
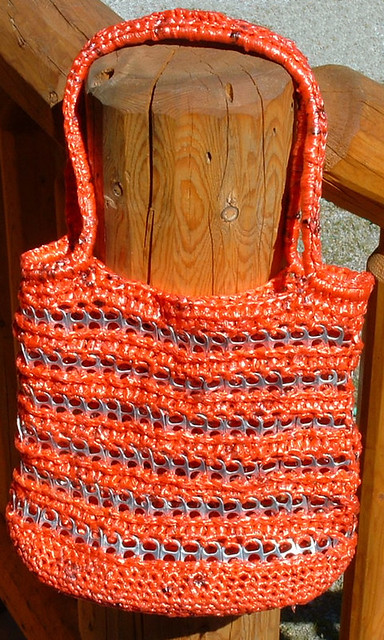
This week I present my first pop tab tote bag project. I was asked to create a tote bag using soda pop pull tabs and recycled plastic bags by a member of my Trash to Treasures group on Ravelry. I have been saving soda pop tabs and beer pull tabs so I could complete this project. It took 252 tabs for my bag. I decided that I would alternate rounds so that it didn’t take so many tabs to do this bag. Plus I like the look of the plastic bags by themselves to separate the pull tab rounds.
I used cotton cord on the base of the bag to give it a sturdy bottom and also on the handles. I found if I wrapped the plastic bag yarn (plarn) around the cord as I crocheted around it, it hides the white cord better. As you may see in the closeup pictures of the base, the first few rows I didn’t wrap it as close as I did in later rounds. The later rounds look better and the white cotton cord doesn’t really show through. I found if I wound the plastic around the cord in small sections and then crocheted around the cord, it worked best to keep the plastic tighter and uniform.
Hope you enjoy this free crochet pattern. Happy 4th of July to everyone!
*********************************************************************************************************************************
Free Plarn Pop Tab Bag Pattern
Materials needed:
One ball of plastic bag yarn aka Plarn
(Approx. 50 plastic newspaper bags cut into 1″ strips of plarn)
252 Soda pull-tabs
4 yards – 12/32 (9.5 mm) cotton cord
Hook: J (6 mm)size metal crochet hook
Description: Plastic Bag & Pop Tab Tote Bag
Bag measures 12 inches wide and 10 inches long with 18 inch straps
Directions:
Ch 20 loosely.
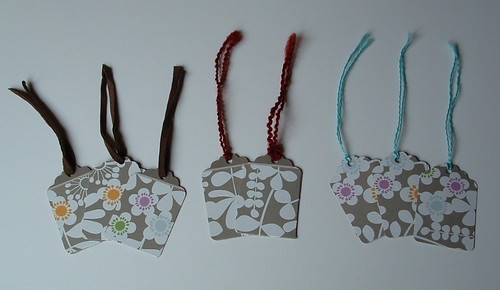
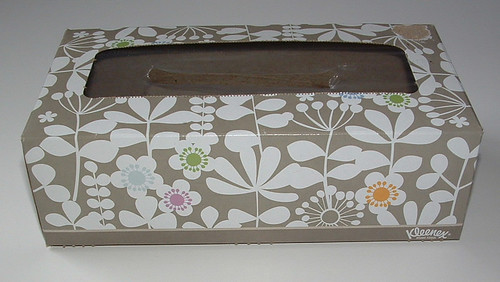
Here are some gift tags I made from a pretty Kleenex box I had. The box was just so cute that I wanted to recycled the cardboard into something useful so I got out my tag die cutter. I cut as many tags as I could from the panels of the box and then used a hole punch to put a hole into the top of the tags. I used scrap yarn and some leather strips for ties to finish off my gift tags.
Here is one other set of gift tags I cut from another Kleenex box. The bottom had some plain white so I cut out a few of those to show you that with some pretty yarn, they make great gift tags too. For the other tags, I used pieces of plarn (plastic bag yarn) for my ties.
This is a really quick and easy project that you and the kids can both enjoy. Let the kids cut strips of yarn or other recycled materials for the ties and voilà — you have yourself some cute and free gift tags.
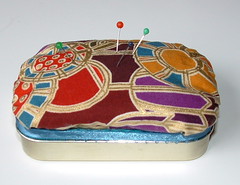
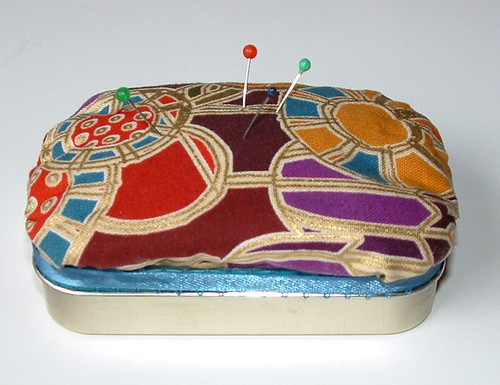
Here is my version of an Altoids tin repurposed into a pincushion and sewing gadget box. The materials used in this project were from an Envelope of Doom (EOD) swap I participated in. If you aren’t familiar with an EOD swap, its where you put some crafting materials into an envelope and mail them off to your partner. The challenge is to use the materials you receive to make things for your partner and then return the finished items back to your swap partner. It was a fun swap and this pincushion sewing box was one of my creations from the materials I received from my partner.
I was inspired by this Altoids project which used a magnetic sheet on the inside of the lid to hold needles and such. There are lots of different crafting versions and great ideas on the web for reusing the tins.
Over at Craftsters Rackycoo’s tutorial is outstanding and has step-by-step photos showing how to decorate your tin. I used a few ideas from the post to finish off my Altoids pincushion box.
I hope my swap partner will enjoy her recycled Altoids tin as much as I did creating the little sewing box. Until next time, happy crafting to all!
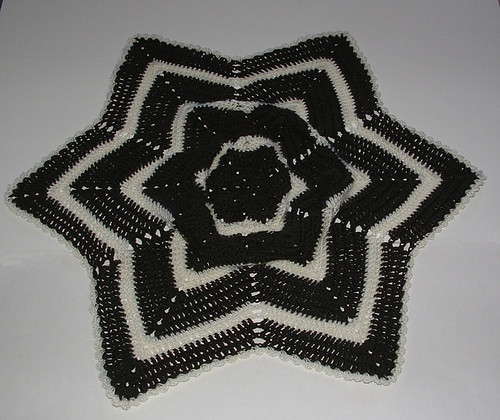
I recently crocheted a six point round ripple and the center was bowl-shaped. So I looked around for a picture tutorial on how I might block the crocheted afghan. I haven’t tried blocking an afghan before as usually they lay flat but this one had an issue and I was so hoping that I could straighten it out by blocking it.
After looking around the Internet, I read several different tips on how I might do the blocking but nothing with photos. Well as I’m a visual type person, I wanted photos with step-by-step instructions. After reading a few ideas, I set out on my own and created my own picture tutorial for blocking my rumpled-up afghan.
Here is my round ripple baby afghan before blocking. As you may see, the center is all rumped up and isn’t laying flat at all.
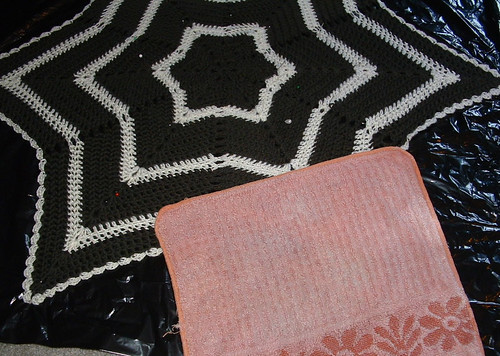
I put down a plastic garbage bag on the carpet and then placed my afghan on it. I gently stretched the points and center and then pinned it down into the carpet to flatten it. Put your pins in at an angle to hold down your blanket as you stretch it. Push down on the center to flatten it further and move your pins to stretch the afghan until it is laying down as flat as you can get it.
Next dampen your afghan with a wet cloth or use a spray bottle to gently wet the material. With the cloth or your hand, flatten the center down and move the pins as needed to stretch the blanket flat. Move the wet cloth around as shown to moisten the yarn so it blocks evenly.
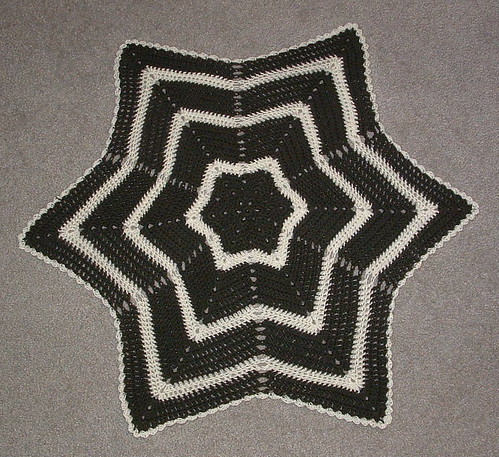
After dampening and flattening your afghan, allow it to dry completely before removing the pins and moving the blanket off the plastic. The next day my blanket was dry so I removed all the pins and the blocking was very successful as this baby afghan is relatively flat and looks much better now.
I hope you find this blocking tutorial useful. Blocking can be a great way to fix those round ripple and star afghans that just don’t like to lay flat after you finish them. Take heart and try my blocking tutorial to fix your projects should you need a little flattening.

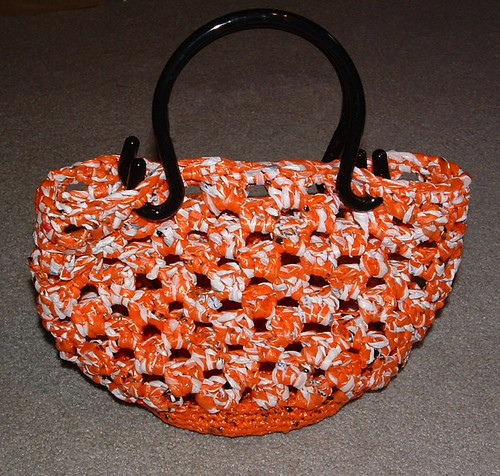
This week I present my latest recycled plastic bag project. I call this my orange crush plarn purse. The purse was crocheted using orange newspaper bags and white plastic grocery bags. You can check out my plarn making tutorials that show how to make the bags into a yarn from either newspaper or plastic retail bags. The base was made using just the recycled bags from orange newspaper delivery sleeves. I then crocheted with two strands of plarn held together — one strand orange and one white. This combination created the orange and white color blend for the main body of the purse which was crocheted using a granny stitch.
Next I added a beautiful pair of purse handles that I picked up from my local thrift store. I was so excited to purchase these brand new, still in the package, handles for just 99 cents. The black handles just added a great final touch to the purse.
This cute purse crochet pattern can be found free over at Debi’s Hooks and Yarns blogspot. I modified her pattern by working 10 rounds in the granny stitch as I needed just a bit more height for my purse. Debi crocheted her bag using two strands of worst weight yarn so you can change up this pattern pretty easily depending on if you want to use plarn, yarn, or even tarn (t-shirt yarn).
Until next time, happy crafting and make it a great day!
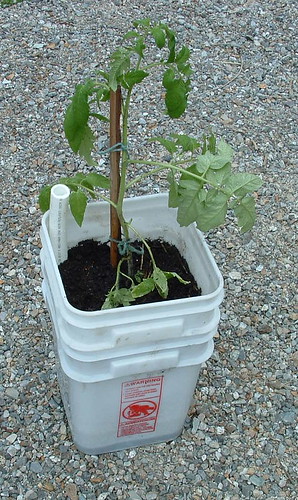
I have a recycled gardening project to share with you all. I’ve heard about self-watering planters that you can make yourself and after searching around the Internet, I found several different versions. For my planter, I used 2 recycled plastic buckets, a tin can, and a piece of plastic piping I found in my basement.
Here is my recycled self-watering tomato planter. I say recycled as I didn’t buy anything for this project and all the items were either recycled, repurposed, or re-used. Now for the details…
I get these buckets for a dollar at my local grocery store’s bakery. They are food grade so they are perfect for making the self-watering containers. I used this DIY tutorial link at urbanorganicgardener.com to make the planter with the pipe. There is also a tutorial at the same link that shows how to make the planter without the pipe and also a plastic pop bottle version too.
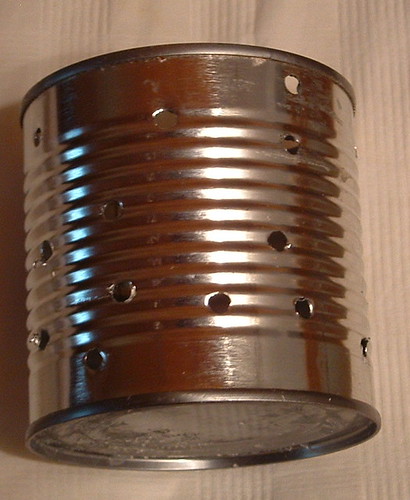
Here is a closeup of the can I used for my wickering can. It’s a 15 oz bean tin can with lots of holes drilled into it. This can was the perfect height for inside my self-watering containers as it just reaches inside the top of the stacked containers.
I made two of these planters in the past 2 weeks. Now I’m just waiting and hoping for lots of tasty tomatoes to grow in my self-watering containers. I’ll post again later this summer to let you all know how it works out using this method.
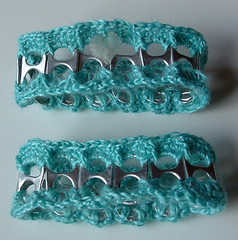
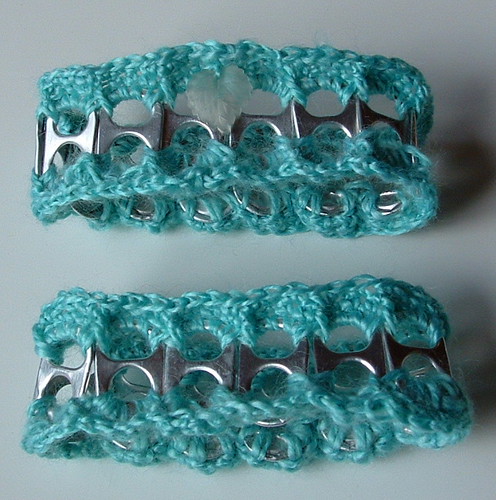
I present my first recycled soda pop tab bracelet. I crocheted these two bracelets using some lightweight yarn that I received in a swap. The yarn was a bit thin so I doubled it up to crochet these bracelets.
Here is the link for the original soda tab crochet pattern that my bracelets were based upon. My friend Kristy created a video which was really helpful for me to understand how to assemble the bracelet using the recycled soda pop tabs. You can view Kristy’s video tutorial below.
I used 12 tabs on one bracelet and 13 on the next one to make it a bit larger. I also added a leaf to the one stitch on the top bracelet. The original pattern calls for 12-14 tabs. Just check the fit of your bracelet as outlined in the video for the correct number needed for your project.

Recycling egg cartons into fire starters is easy and a very frugal way to start your fire. Whether you are starting a fire in a wood stove or campfire, fire starters are always a handy thing to have on hand. I love making my own fire starters from recycled materials I have on hand.
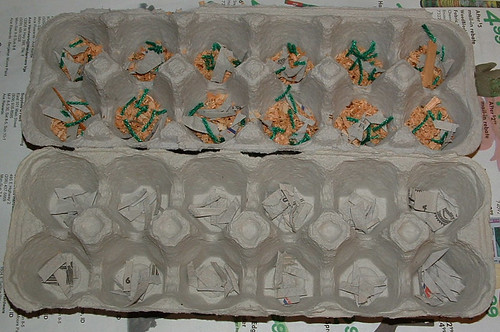
I use old egg cartons for my base and then add bits of burnable materials such wood shaving from a chain saw, pencil sharpener, or a miter saw. I put some wood shavings in the bottom of the egg carton holes and then added bits of cut up cardboard and scraps of cut up yarn. The added scraps of materials make your fire starters easier to light and help the burning process to produce a great fire starter.
Next I melted leftover wax from an old candle in the glass container it came in. I placed the glass jar in some water in a sauce pan. Over gentle heat, warm the wax until it melts. I added more bits of old wax to the jar as needed to cover the materials in my egg cartons. I used an old spoon to dribble the wax over each fire starter in the egg carton.
Click on photos to supersize
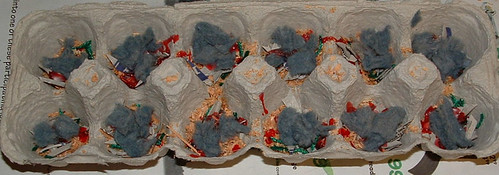
I added some lint from my dryer in one egg carton set as shown above. Dryer lint burns well and is a wonderful material to use for making fire starters.
I dribbled more wax over my fire starters and here is the final results. Now just separate the individual filled egg holders from each other which results in 12 very wonderful fire starters.
Closeup of the finished fire starters made from recycled materials.







Recent Comments