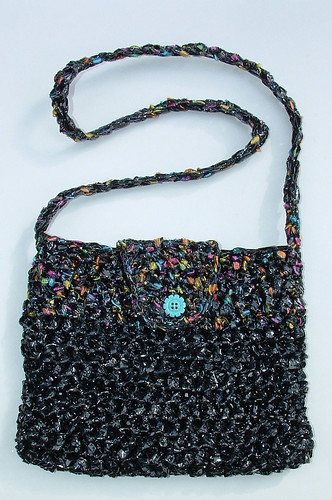
If you are into recycled crafting, you might want to try crafting with vcr video tapes. The beauty is using these reels of pre-made materials is that you simply just need to open up the cases and away you can go with your crafting. You can use my tutorial on how to turn vcr video tape into “yarn” to craft your projects.
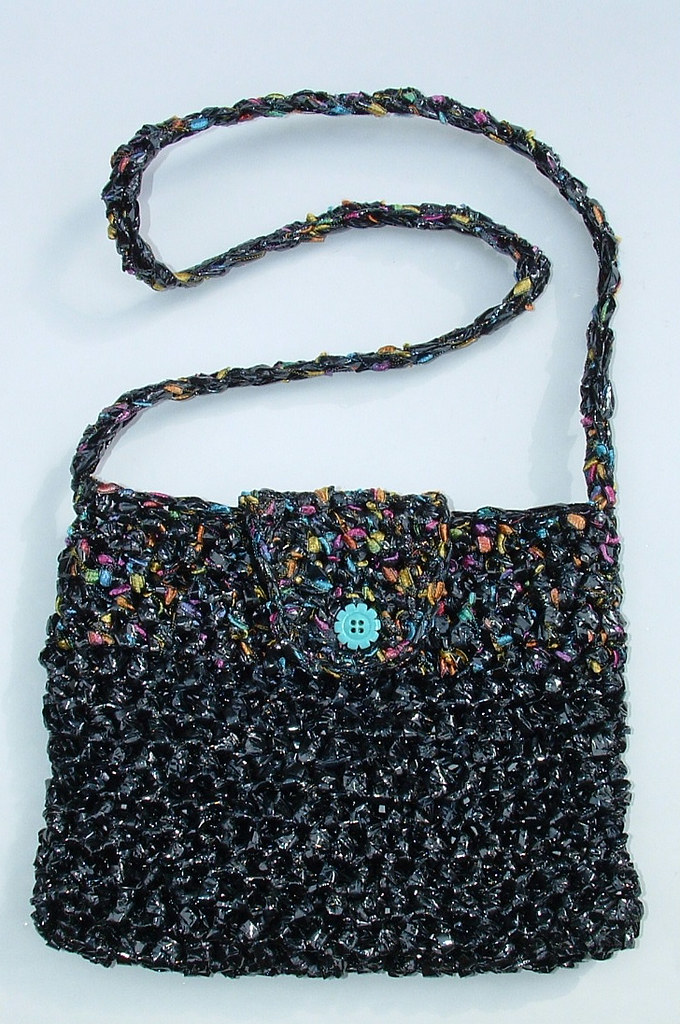
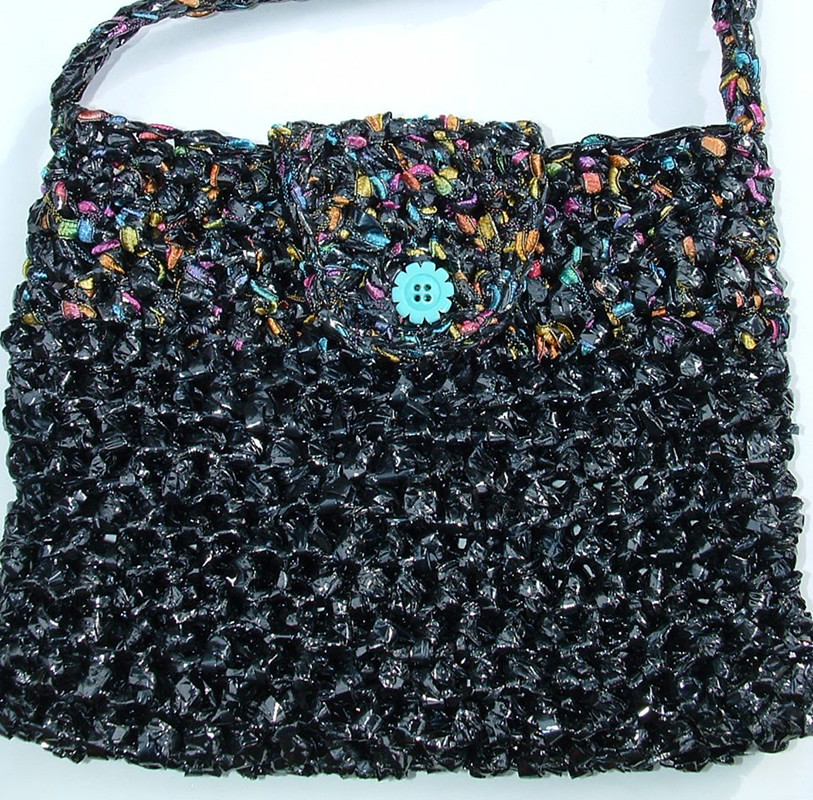
This week I broke down some old vcr tapes that I had to crochet this purse. I added some lacy ribbon yarn that I got at the dollar store for 99 cents to add a different look to the project. Below is closeup of my finished project.
Recycling video tapes into craft projects is always fun and while it’s not the easiest material to work with, the results are very pretty. The unique shine of the tape is beautiful and the ribbon yarn gives it a colorful finish. Plus its a great way to recycled those old video tapes that so many people just have laying around and can’t figure what to do with them. Well here ya go!
******************************************************************************************************************
Free Crocheted Video Tape Purse Pattern
Purse measures 9 inches wide and 7 inches long
Strap length is 32 inches long
Materials:
2 VCR VHS Tape Reels (only used about 1/4 of each reel)
One 3/4 inch button
3/4 oz Lion Brand Trellis Lacy Ribbon Yarn (Pastel Garden shown)
Hook:
N (9 mm) crochet hook for main purse
J (6 mm) crochet hook for flap trim
Using 2 strands of video tape held together, Chain 20.
Rnd 1
Hdc in 2nd ch from hook in each chain. Continue around the corner and down the back side of chain by working a Hdc in every stitch of chain.
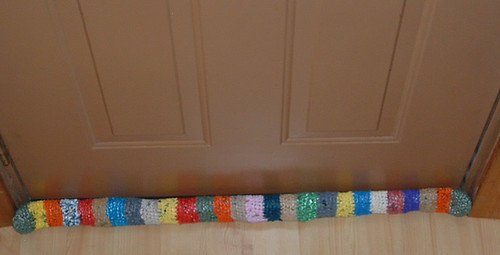
Drafts from around doors and windows is never a good thing. But you can craft your own draft stopper or dodger from recycled materials to save on your heating bill and help keep your home warmer.
You can use scrap pieces of plastic bags or other stuffing material to fill the shell of the draft dodger. For this particular project, I crocheted my draft dodger from recycled plastic bags. It was a great opportunity to use the many different colored plastic bags that I have been saving. Each stripe only takes between 2-3 bags each. It’s hard to find colored bags in large qualities so this was the perfect project to utilize the pretty colors that I have been collecting but didn’t have enough of one color for a large project.
I crocheted my draft dodger and then stuffed it using the scrap pieces that you get when you make plastic bag yarn or plarn. When I make my plarn, I have the end pieces and the handle portion that I don’t use as I assemble the loops. So I took those leftover plastic bag pieces and used them for the stuffing of my draft dodger. You want to stuff the draft dodger before you close the ends. I put in a few pieces of plastic and then used a broom stick to push them into the shell of the draft dodger. You want to stuff it somewhat loosely so that your shell isn’t too stiff and so it doesn’t stretch out the shape of the tube. I stuffed from one end until it was nicely filled to the halfway point and then closed that end of the tube as shown in the pattern below. Then I repeated the stuffing for the other end.
That completes the project and below you will find the free crochet pattern details for the draft dodger. Adjust the length as needed for your door or window. But most importantly enjoy working this recycled craft project.
Draft Dodger Crochet Pattern
Materials needed:
Variety of plastic bags made into Plarn
Approx. 56 plastic grocery bags
Stuffing material for inside the draft dodger shell
Hook: J (6 mm) U.S. size metal hook
Description: Draft Dodger
Measurements: 3 inches wide x 38 inches long (or width needed for your door or window)
Directions:
With J hook, ch 18 and join to form a ring. Make sure your chain is not twisted and your stitches are facing out. This pattern is worked in the round and is done in single crochet stitch.
Sc in each stitch and don’t join at the end of each round but rather just continue working in the round for 5 rounds in each color. At the end of the 5th round. Finish off at the end of 5th round by cutting the plarn and working a slip stitch into the next two stitches to end the round smoothly.
Ch 1 at the beginning of each new color and slip stitch into the last […]

With Easter just around the corner, I thought I post some of the recycled Easter baskets that I have crafted in past years. So if you are looking for recycled Easter basket projects, let me share a few links of free patterns with you. This cute green Easter basket was made from a recycled plastic soap base and then I crocheted the top using plastic bags.
Maybe you need something a little smaller, if so check out this mini plarn Easter egg basket. It’s a real quick and easy pattern. Also it only takes about 3 to 4 plastic bags made into plarn to crochet.
Should you need a large Easter basket, here is my big recycled Easter basket that I crocheted from some purple plastic bags that you were given to me several years ago. To this day, I’ve never seen bags this color again and was so fortunate to be given them by a reader of this blog.
I hope you enjoyed this little parade of recycled Easter baskets that I have crocheted. Happy Easter Everyone!
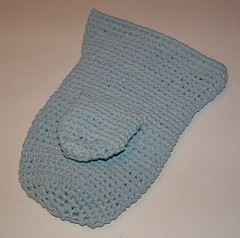
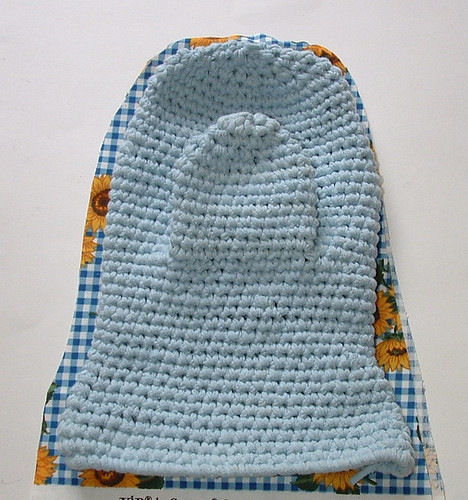
A few weeks ago I shared my crocheted oven mitt project that I made from a recycled cotton bed sheet. At that time I hadn’t been able to line the oven mitt but I just got the lining done and wanted to present the photo tutorial.
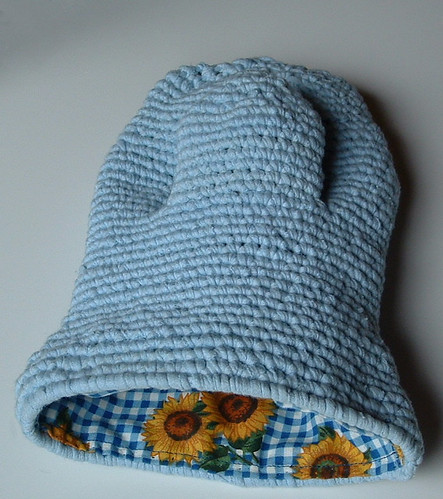
Here is my finished product with the lining sewn inside the t-yarn oven mitt. This lining project would work for any crocheted or knitted oven mitt.
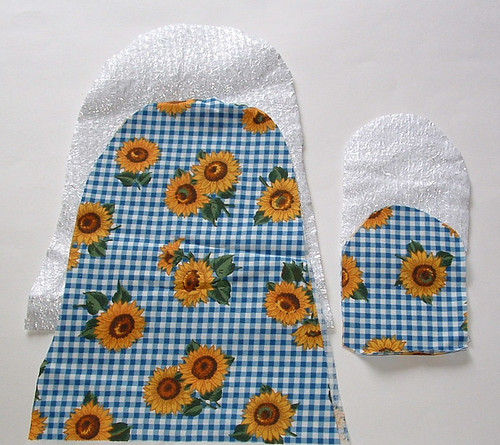
The first step in this lining project is to lay out and cut your lining fabric and heat protection material. I used some scrap fabric that I had on hand along with a piece of Insul-Bright insulation material. Insul-Bright is an inexpensive material that provides heat protection and is designed for use in oven mitt and potholder projects. You just need enough fabric to cut out two oven mitt shapes and one shape from the insulation material. You need to cut out two thumbs from the printed lining fabric and the insulation material.
Next step is to
Reclaiming yarn from thrift store sweaters is a wonderful and frugal way to get some very nice yarn at a terrific price. I’m always on the lookout for great deals on sweaters that I can unravel the yarn. You have to make sure you get the right type of seams otherwise the sweater won’t unravel properly making it difficult to reclaim the yarn.
There are several excellent resources on the Internet where seams that can be unraveled easily are shown. Most importantly the bad type of seams are shown so you can avoid those sweaters as there is nothing more frustrating than trying to unravel a sweater when it’s unravel-able. Here is a link to an outstanding post that shows detailed pictures of the seams and how to unravel sweaters.
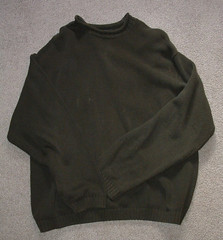
Here is my latest thrift store sweater that I got for a dollar. It had a new stains but otherwise was an outstanding candidate for me to reclaim the yarn. It’s 100% cotton and was an extra large men’s sweater so it contains lots of yarn.
Cotton yarn is something that I use frequently and it’s very versatile. I can make baby blankets, dishcloths, baby bibs, hotpads, potholders, placemats, rugs, totes, and purses from the recycled sweater I unraveled.
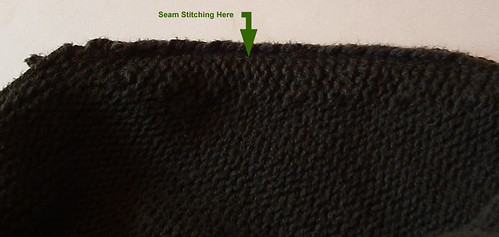
Here is a up-close photo of the seam. If you look closely you can see that the seam doesn’t have a serged edge. I have marked the stitching of the seam in the photo. The stitching is what you want to use a seam ripper to remove so you can open the seam and separate the pieces for unraveling. You want to avoid edges that are serged as the piece won’t unravel. Click to supersize the photo if you want to see a closeup.
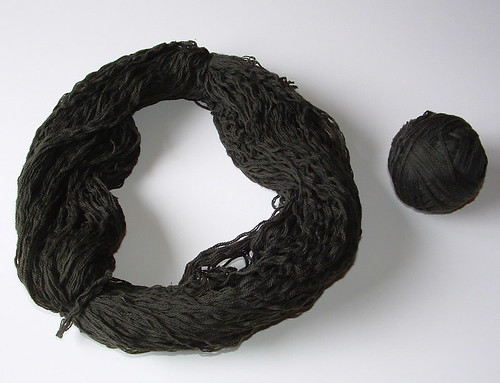
I wrap the reclaimed yarn in a hank form for washing as shown here. Once I have it in a hank form with a few ties to hold it in place, I gently wash and rinse it in the sink. Then I hang it to dry so my reclaimed yarn is clean and fresh smelling. And because I like balls of yarn, here is one sleeve that I wound into a ball after washing and drying.
Now I just need to finish unraveling the rest of the sweater and decide on a project or two for the recycled yarn. I’m thinking about using some of the reclaimed yarn for dishcloths and because the yarn is so soft, I plan to use some it for a baby blanket.
With the cost of cotton rising these days, it seems reclaiming yarn is not only a green thing to do but also very frugal. I hope you have found this post informative and if you find yourself strapped for money or yarn that you consider reclaiming yarn. As always, happy crafting to all.
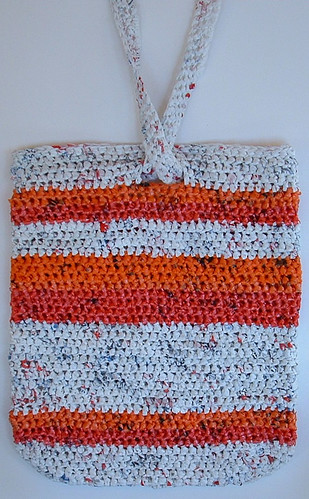
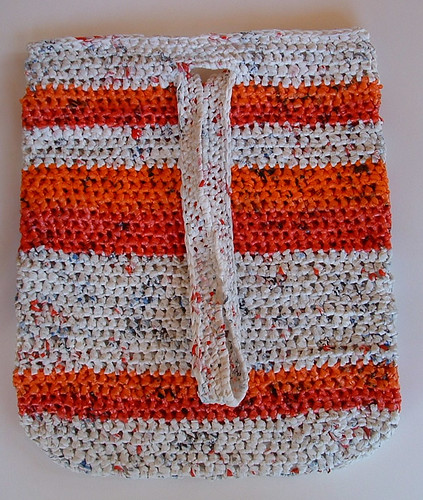
I crocheted this pink and orange striped tote bag from recycled plastic bags. The pink and orange bags are newspaper bags and the white bags are just normal plastic retail sacks. As most people know, white bags are abundant while its hard to find colorful bags but I’m lucky to obtain the pretty pink and orange bags from my local library. They save the bags that they receive their daily newspapers in and I collect them weekly.
I used my jumbo plarn beach bag pattern to crochet this bag with just a few minor changes from the original pattern. My base was a chain of 30 as I didn’t want quite as large a tote bag for this project. I also just crocheted 41 total rounds. The result is a tote bag that measures 14-1/2″ wide by 17″ long with a 30 inch long pull-through strap.
You can check out my plarn making tutorials here whether you are using newspaper plastic bags or regular plastic bags to create your plastic bag yarn.
This tote bag makes an excellent market bag as the long strap can be slipped over your shoulder or looped around your hand for carrying. You can craft this tote bag project or if you aren’t a crocheter, my pink and orange recycled plastic tote is for sale here.
I think most people know the yarn you can create from recycling old t-shirts is called t-yarn or tarn. But did you know that you can also recycle old cotton jersey sheets to make the same type of material?
I recycled an old cotton sheet to create this crocheted oven mitt. I cut the sheet into very thin strips and curled it as outlined in t-yarn making tutorial. I used half a twin sheet which is probably less than two t-shirts should be using tees to make your oven mitt.
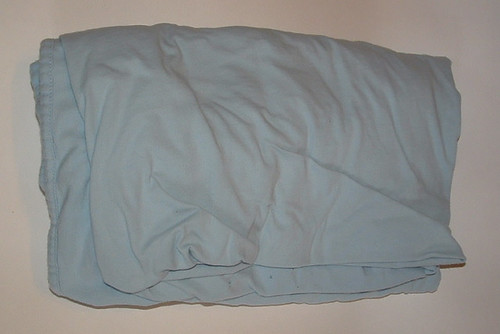
Here is my cotton sheet before I started. I was lucky to get it free from the rag box at my local thrift store as it had a few holes and some minor discoloration. As you cut the strips you can work around any holes and the color differences really don’t show in the yarn that is created.
This recycled oven mitt project fits a woman’s size medium hand. Should you need a larger mitt, just do a few more rounds as indicated in the crochet pattern below. As always, I hope you enjoy my free pattern and have fun creating your own t-yarn oven mitt.
****************************************************************************************************************************
Free T-Yarn Oven Mitt Pattern
Materials needed:
About half a twin jersey sheet or a couple of t -shirts cut into 3/8 inch wide strips and
gently pulled to curl your t-yarn or tarn
Fabric for the lining and one piece of insul-bright for heat protection
Hook: H (5 mm) U.S. size metal crochet hook
Size:
Woman’s medium sized hand
Finished Oven Mitt: 6″ wide x 10-1/2″ long with 7-1/2″ opening
Using t-yarn, Ch 44 and join with a Sl St to form a ring. My ring was approx. 7 inches wide if measured flat.
Rnd 1
Sc around the entire chain as you work along the ring. This allows you to slide the sts as needed
to get a smooth band around the ring. Join with a Sl St into beg Sc. (Approx 50 Sc)
Do NOT turn your work in this project. This project is worked in rounds.
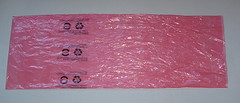
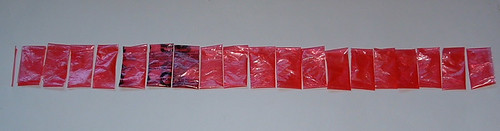
This tutorial shows how you can recycle plastic newspaper bags into plastic bag yarn or plarn. Converting these narrow plastic bag sleeves into yarn is very similar to cutting retail bags to make plastic bag yarn. I have create a picture tutorial outlining the steps below. This method can be used for any narrow plastic bags like newspaper sleeves, English muffin bags, packing pillows and any other skinny plastic bags. The result is short plastic loops that can be joined into one long continuous strip for crocheting, knitting, or weaving.
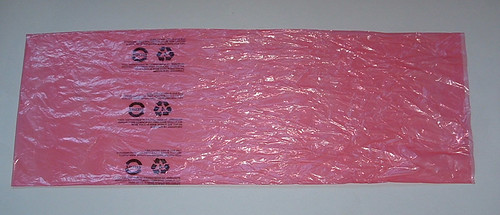
First step is to take the newspaper bag which measures 7-1/2″ wide x 21″ long and flatten it out.
Click on any photo to supersize
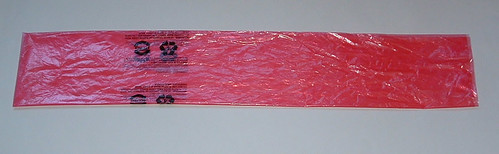
Step 2 is to fold it in half lengthwise.
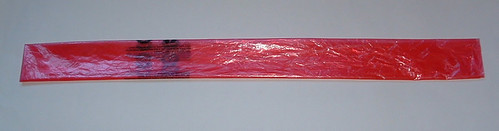
Step 3 is to fold it once more lengthwise. Now you are ready for the cutting stage.
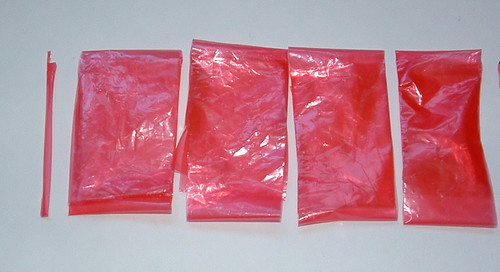
Step 4 you cut strips 1 inch wide across the short length of the bag. This creates 1 inch wide loops of plastic.
Step 5 is closeup of the 1 inch wide plarn loops. Because the end is sealed off, cut a very thin strip at the end of bag to open up the last loop.
Step 6 shows how you interconnect the loops and then pull the knot tight.
If you cut the strips about 1 inch wide, it will result in about 19 loops per newspaper bag. Once joined together, this nets about 3-3/4 yards of plastic bag yarn per newspaper bag. Continue to add loops to your chain of plarn rings to make your recycled plastic bag yarn for whatever crafting project you may have in mind.
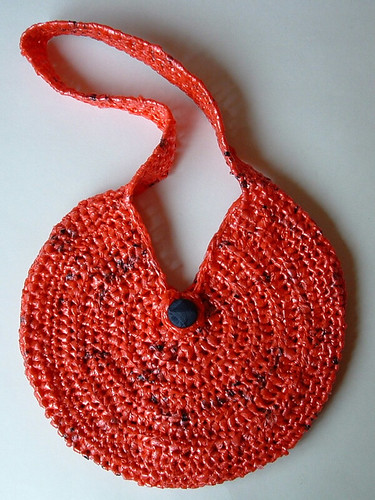
I call my latest recycled bag A Slice of Plarn. It is crocheted using salmon colored plastic newspaper bags. The finished purse looks like a slice of tangerine or orange to me and therefore this is how this plastic bag project got its name.
The pattern I used is for a crocheted hobo bag that is available free over at Crochetspot blog site. I adapted the pattern just a bit to allow for the difference between using plastic bag yarn and regular yarn. I worked the pattern in half double crochet stitch rather than double crochet. I also worked a row of single crochet along the inside wedge edges just to give it a smoother finished.
My finished bag is 9 inches tall and about 10 inches wide. I worked just single crochet stitches on the strap to provide a stronger strap so the plastic wouldn’t stretch too much when the purse is used.
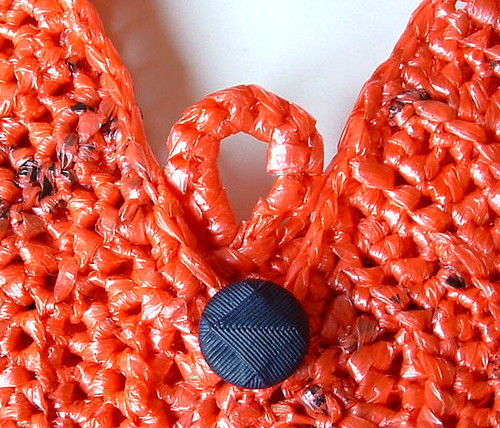
My button loop includes another round of single crochet around the basic chain that the original pattern calls for. Again because I was working with plarn, I felt that my loop need the extra round of stitching to make a secure closure.
So whether you want to make your purse with recycled plastic bags or yarn, I hope you enjoy the project and thanks to Rachel for another great free pattern over at Crochetspot.





Recent Comments