
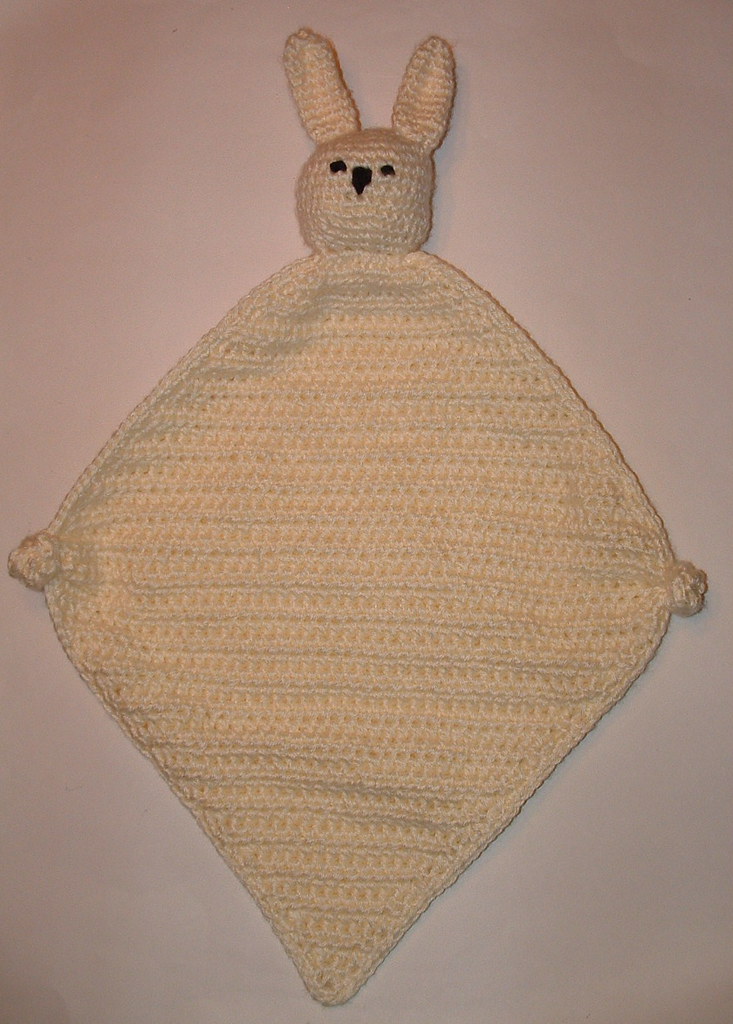
Here are one Easter craft projects that I have been working on. It is a blanket buddy that I crocheted for my newest granddaughter’s first Easter. I crocheted it using this blanket buddy pattern but with some changes which I detail below.
I used a H (5 mm) hook and crocheted with double strands of off-white Caron yarn. I did 20 rows on the blanket before I began the decrease portion. I know many people have said the blanket pattern as written was small so I wanted to make mine bigger. My finished blanket is 17 inches wide by 18 inches long not including the bunny head.
I used black yarn to do the face. I worked on the face for quite some time and while I’m not completely happy with it, I’m finally calling it good. At least as good as I could get it.
One other important thing to note when working this pattern is that

Here is a new twist on recycling those plastic produce nets that lettuce comes in at your grocery store. I crocheted using cotton yarn along with the netting to create these handy diagonal scrubbies.
You probably have seen the double thick diagonal potholders before. You basically single crochet in the back loops only in the round until the ends begin to curl around and then the sides close in to each other if you continue. Here is an excellent crochet pattern and picture tutorial that shows the method.
Ch 14 for a 3 inch scrubbie. I used a J (6 mm) crochet hook and 2 and a half lettuce nets. Ch 19 for a 4 inch scrubbie and about 4 lettuce nets. I used Sugar and Cream in psychedelic cotton yarn to crochet both scrubbies and still had enough left to make this small matching dishcloth using my open mesh magic dishcloth pattern.
You assemble the lettuce nets by cutting them about 1 inch wide across to make loops. Here is my picture tutorial on assembling the netting loops so you can crochet with it along with the cotton yarn. You just hold the lettuce netting strand along with the cotton yarn as shown here to crochet the scrubbies. I turned my work to the outside once the edges reached each other which creates the seed stitch look to the scrubbers. Weave closed the seam by using the tail of your cotton yarn to finish off the scrubbie.
The result is some great recycled scrubbers that can be used on non-stick pans as well as for cleaning your sink, bath or other cleaning needs.

This free crochet pattern is a variation of my fingerless gloves as you basically start out with the same pattern and change it when you come to the heel. The basic pattern is crocheted in the round and is designed to fit a woman who wears a size 9-10 medium shoe. I also crocheted a pair of these socks smaller and I have included those changes at the end of the pattern below.
Women’s Crocheted Socks
Yarn:
2) Patons Stretch Sock Yarn 1.75 oz each – Sugar
Hooks:
F (3.75 mm) size crochet hook for ribbing only
G (4.25 mm) size crochet hook
Description:
Women’s shoe size 9-10 M socks
Directions
Make 2 socks as follows:
Using F hook for ribbing, leave a long tail and ch 11.

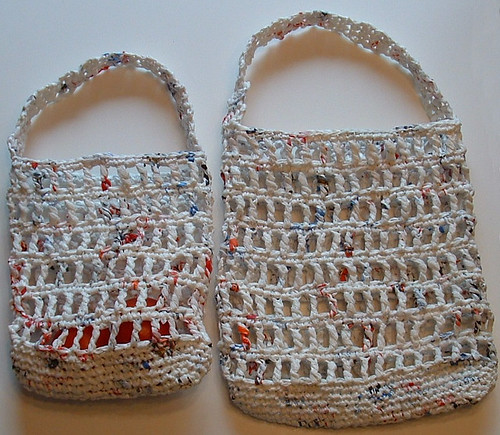
This week’s recycled bag project is a crocheted plarn produce bag. I have had a reusable produce bag on my to-do list for some time now. And thanks to a request from a reader of my site, I was encouraged to finally get it done.
Here is my plarn making picture tutorial to help you get started. Crafting with recycled plastic bags is fun, frugal and a great way to recycle plastic bags into something new and useful like this reusable produce bag.
Plarn Produce Bag Pattern
Materials:
Plastic bags cut into 1 inch strips approx. 20 bags for small produce bag and 35 for larger bag
Hook: Metal J (6 mm) crochet hook
Description:
Small produce bag: 8 inches wide by 9-1/2 inches long with 13 inches strap
Larger produce bag: 10″ by 11″ long with 14″ strap
Directions are given for the smaller produce bag and then options for the larger bag given at the bottom of the pattern.
Round 1
Ch 20, Sc in 2nd ch from hook and in ea st and then working around the backside of chain, Sc in ea st along the other side of original chain.

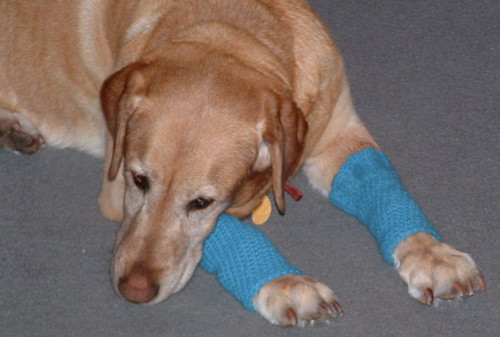
If you are a frequent reader of my blog, you know that I often make things that I need rather than purchase them. I so enjoy creating something to fill a need I have. Well, my dog has been having these issues of licking her forelegs and they were getting very sore. There is nothing wrong but it’s just a bad habit of her’s to lick her legs. I tried putting some socks up on her legs to prevent her from licking but that didn’t work very well.
Here is a closeup of the dog legging I crocheted. My dog’s foot is about 7 inches around at her paws. I tried to make the leggings loose enough to fit over her paws but tight enough to stay up once on her legs. I found if you roll them up a bit it’s easier to get them on over her claws and up on her legs. They stay on pretty good but she did manage to lose one outside in the snow but I found it. So just a word of caution, they do stretch out so make sure you make them tight to begin with so they stay on. I usually just make her wear them in the house now so we don’t lose them outside.
The final word, they do work and it does help prevent licking and has allowed her sore legs to heal. Now maybe I won’t have to put them on her for awhile. So another problem solved and here is the free crochet pattern below.

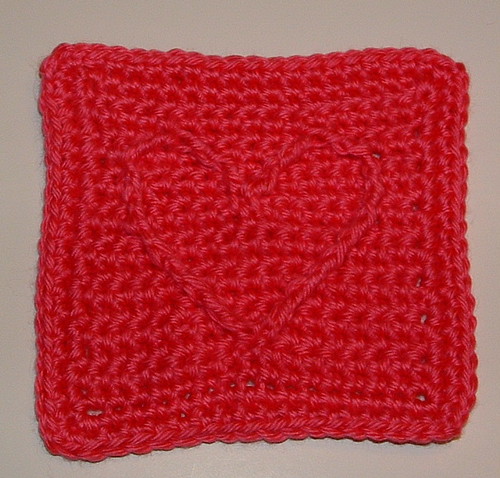
With Valentine’s Day just around the corner, I thought it might be fun to share some Valentine themed craft projects that I have been working on. Last month I participated in a cabled heart crochet along and here are the two heart squares I made.
The 12 inch crocheted cabled hearts square features 4 hearts.
This 6 inch cabled heart square pattern features just a single heart.
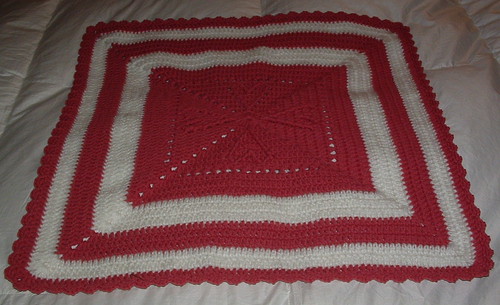
I just loved the 12 inch Yarncrazy Cabled Hearts Pattern (not available anymore) and thought it would make a wonderful center for a crocheted baby blanket. So I used the large square and then proceeded to double crochet around it to create this baby afghan.
Here are a few Valentine heart bookmarks I crocheted.

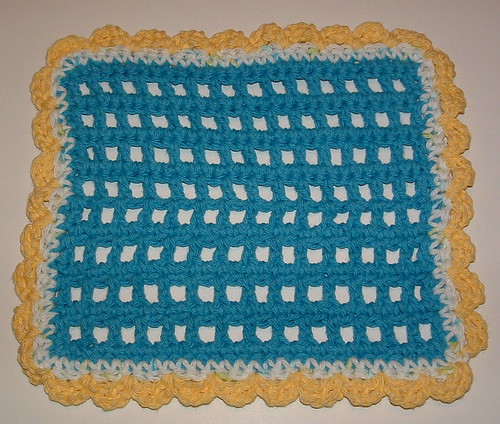
Here is my latest free crochet pattern. I call this dishcloth Many Scalloped Boxes. This dishcloth pattern is a variation of my open mesh magic dishcloth pattern. It’s worked with a sport weight cotton yarn and features a scalloped edging.
Here is another one worked in regular weight cotton. If you like a more open-stitched lightweight dishcloth, you will enjoy using this crocheted dishcloth. It dries out quickly while still providing an excellent cleaning cloth.
Many Scalloped Boxes Dishcloth Pattern
Hook:
G – (4-4.25 mm) Crochet Hook
Materials:
1.25 ozs Cotton yarn
1/4 oz of contrasting Cotton yarn if you want the edging in another color
Description:
8 – 8 1/2 inch square dishcloth depending on yarn used
Directions:
Row 1
Ch 34, Sc in 2nd ch from hook and in ea st. (33)

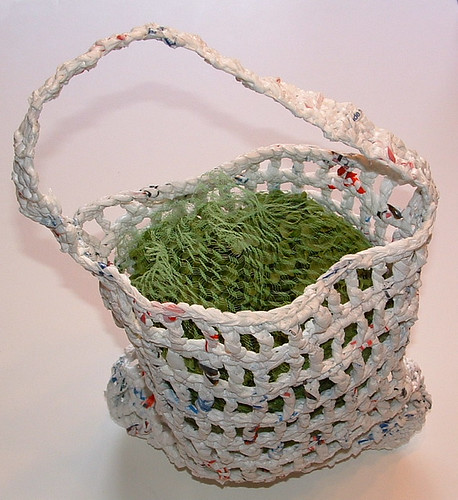
Here is my recycled plastic bag tote that features a crocheted sunflower. The tote bag is crocheted using recycled plastic bags or plarn and then the sunflower embellishment is added. I created the sunflower crochet pattern using both plastic bags and regular cotton yarn so it could be done in either type of material. Here is the recycled plastic tote bag pattern and below you will find the free pattern for the sunflower.

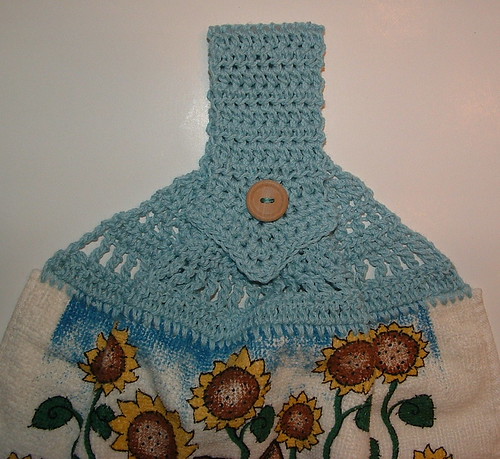
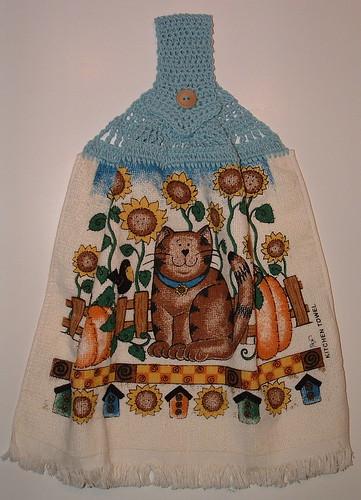
Here is my latest towel topper crocheted pattern. It is a double layer towel that is folded over and requires no cutting or sewing. The towel topper is simply added by working a base row along the top edge of the towel using a small steel crochet hook. I have a picture tutorial here that shows in more detail how I fold, pin, and crochet the first base row through both layers of the folded towel.
Here is another one I did using a printed novelty towel.
*******************************************************************************************************************************
Pointed Handle Towel Topper Pattern
Materials needed:
1- Kitchen towel or decorative towel (15 inches wide x 24 inches long used)
1- oz. Sport weight mercerized Cotton
1- 3/4 inch button
Hooks:
#7 Steel hook
G (4-4.25 mm) hook
Directions:
This towel topper uses the double layered fold and pin method. See my picture tutorial on how to prepare the top of towel to begin Sc stitching along top edge if you are not familiar with this no-sewing or cutting method. All crochet terms are US as shown in this pattern.
Row 1
Fold the towel exactly in half and using the steel crochet hook to poke holes, Sc evenly along the top edge of towel. (You will be Sc’g through both layers of the towel along the top edge.) I had 60 Sc along the top of the edge but it will vary depending on your stitch placement and yarn weight used. Just try and have an even number of stitches along the top. Otherwise it doesn’t matter how many stitches you have along the top of the towel.
Row 2
Using the G crochet hook, Ch 2, turn. Dc in each st.


Recent Comments